Showing posts with label tutorial. Show all posts

Monday, December 19, 2011

Poinsettia Flowers Tutorial from Card

Hello everybody

No matter how hard I want to be better blogger, various things always get on my way and crafting and blogging goes into second plan.


I hope I will make it up to you buy offering one simple tutorial for all those enthusiastic crafters  who enjoy making own embellishments.

I came up with this watching several different tutorial for all sorts of flowers, so it is not exact copy of somebodies work but it is sure inspired by other peoples work. I love making these using tick handmade paper, unfortunately I cannot always find this one so there is a way to achieve the texture using cardstock.

For this project you need:


  1. Solid core card (red and green) 
  2. some punch with at least one pointy end, I am using very old craft tonic tear drop punch
  3. some water mister
  4. scissors
  5. Liquid glue (look for acid free one if you are making these to use on your scrapbook pages)
  6. inks - optional
  7. micro-beads/beads/buttons for flower centre
  8. one small circle in red, could be punched or hand cut   
  • Punch out 10 petals using your chosen pointy punch. Trim off sound side of 5 of them so that are slightly shorter. Then put them all on a craft sheet or some scrap paper and slightly mist them. take care not to overdone.

  • Then crunch up each of them making tiny balls, see the photo above.
  • Carefully unfold each ball, and you can ink them at this stage if you wish. You might find that pigment or chalk inks are better for this then distress inks.


  • In next step apply glue on your circle and start gluing larger petals as shown bellow: 


  • Once first layer is done you have something like picture above. Then apply glue in a middle of your flower and glue second layer of the smaller petlas and there your flower nearly done:


  • Then apply more clear glue in a middle and add your chosen flower centre. If you using micro beads it is a good idea to wait until the flower and glue is completely dry then continue with this step. This is to prevent your micro beads to be glued on places you don't want them to appear.      
  • Once your flower is dry you can punch out some green cards and leafs under your flower bud.
And there are few cards I made with these:


Hope you enjoyed my tutorial. Have a lovely day.

Svjetlana x

Monday, June 27, 2011

Yo-yo flowers tutorial

Hello everybody,

I hope somebody is still reading my blog. When I started it I thought I would be posting far more often then I do, but at this stage I can promise at least 2 posts per months. I hope quality is what counts not quantity.

I was too busy with many different things, but craft-wise I had few 'Thank You' cards for teacher and her assistant to make, I did couple of LO's (they still waiting to be photographed) and I managed to make few more yo-yo flowers and take few snaps (forgive me a bad photo quality as I did it with my mobile phone) for the tutorial.

I saw the instructions for this flower for the first time about year ago in Simply Handmade by Northridge Media, they used it to decorate hair clips and hairband, the flower is very versatile, could be used on garments, handbags and of course papercraft.

Now, for the flowers you will need some fabric (non-stripy), scissors, needle, some thread and something for flower centre, I like using beads or button. If you not good in sewing don't be put off, it is really simple.
Cut the circle out of fabric about twice a size of your desired flower, small imperfections will not affect the flower, so you do not need die cut machine for this, hand cut circle will be just fine.
Sew long stitch along edge of the circle all way around, you do not have to tie knot at this stage, just leave enough length of the thread loose

When two ends of the thread meet together, finish on the same side of fabric where you started and tie both ends together, you have to have a little sack.

Put your 'sack' flat on the surface centring the gathered bit as flower centre. To make your flower looking nicer sew both ends of the thread to the back side and tie them into a knot on the back, then you can sew back one end and use it for sewing your chosen flower centre. 


I hope you like the tutorial.
Thank you very much for visiting my blog.
Svjetlana x


Wednesday, May 4, 2011

Raffia Flower Tutorial

Hello

I hope somebody still visits my blog.

I am not going to write much details about my private life on this blog, but there is something I have to share because it does affect my crafting a lot; I have been having problems with my employer for several months now (working but not being paid) and finally have been laid-off from my job a week ago. That puts lots of pressure and put me a bit down and off crafting, but I am coming back to it slowly.

Now back to the tutorial. This flower is inspired by most recent releases by Prima. I figured out two ways of making them,  one way is very fiddly, and I just could not manage to do it and take photos at the same time, might do video once, but I am not that brave at the moment. So I will show you my second option:

You will need:
  1. Raffia
  2. A pair of scissors
  3. Bigger jump ring or some ring made of wire  
  4. Glue gun,
  5. Paper circle, and some flower centre
  6. Optional: Crochet hook and mist and/or paint 

  • Cut raffia into pieces at least 2.5 times longer then you want diameter of your flower to be. I'd say, about 30 of these is needed.

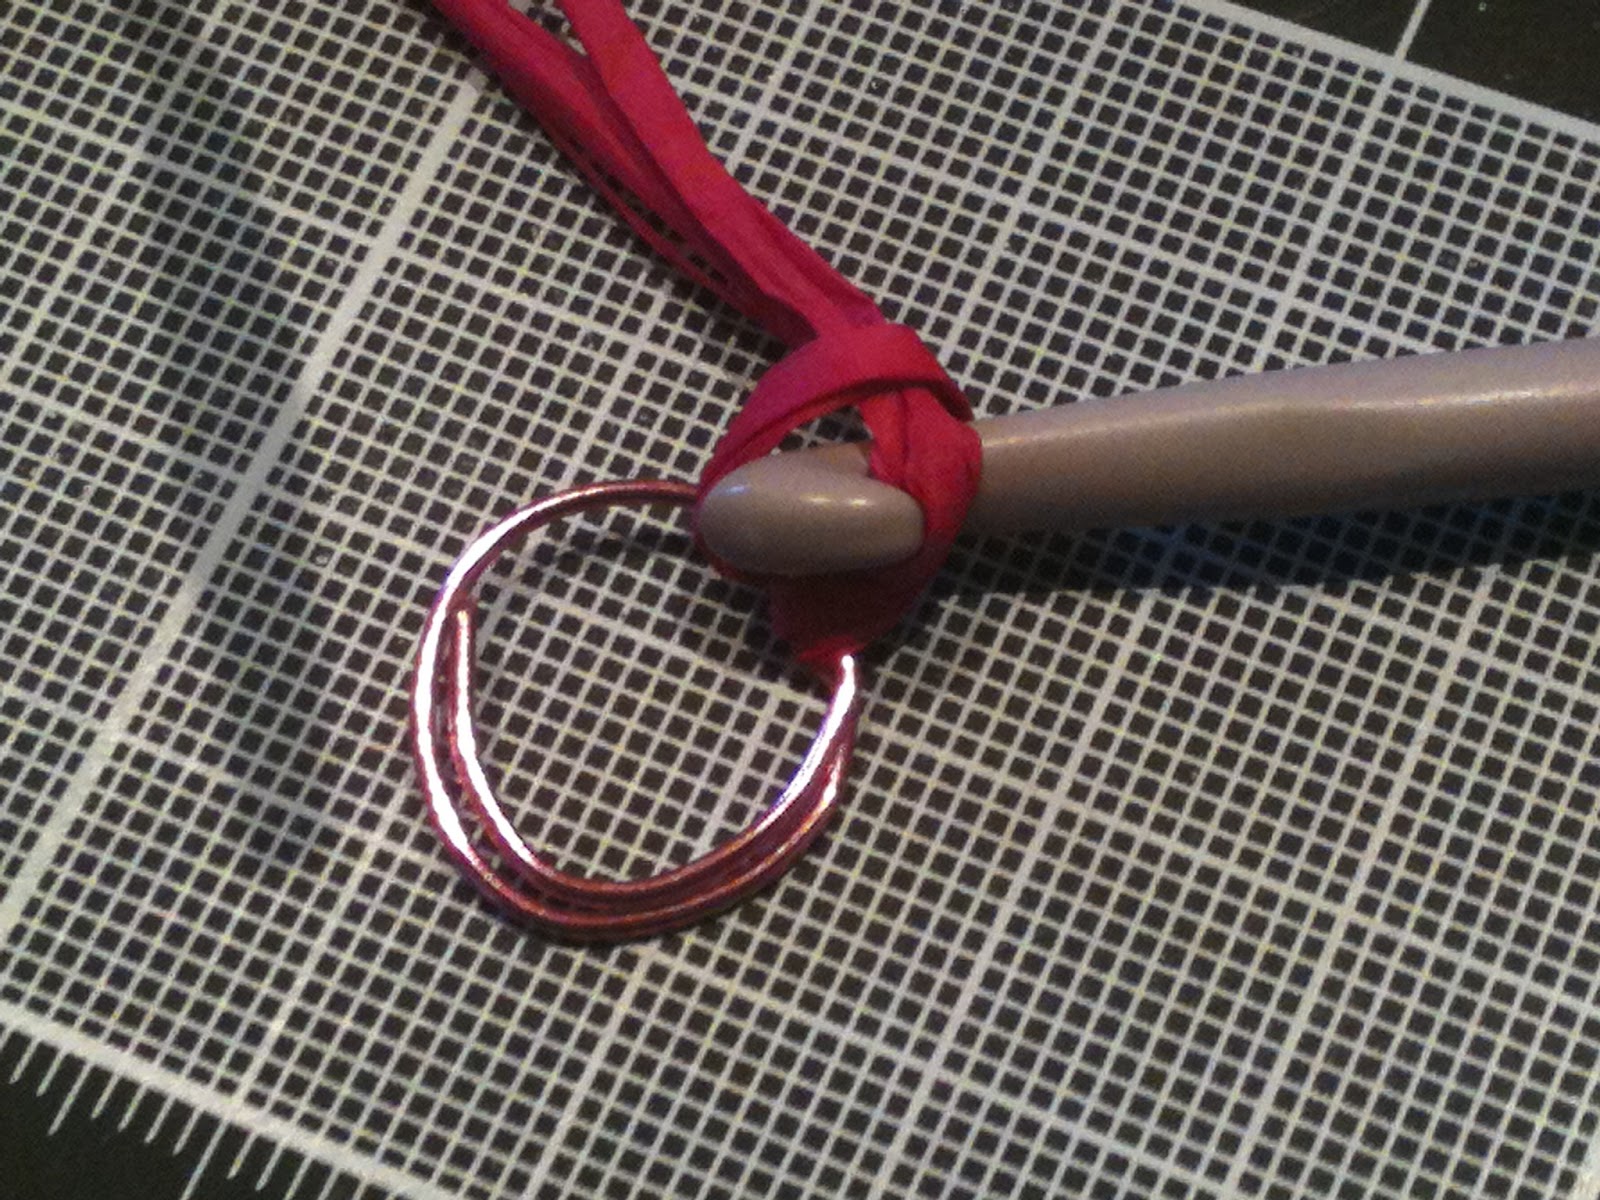
  • Fold each piece of raffia into half and crochet (hm mm.. is that a right word, I am not sure, but I thing the photos show what I mean) it onto your ring. keep doing this until the flower is dense as desired.
  •  Then take some template circle and trim the flower to the desired size and shape. Glue gun paper circle on the back side and chosen flower centre on the front of the flower.

And this is all for now. I hope this will be useful.

Be back later

Svjetlana xx


Wednesday, March 9, 2011

Fabric Flowers Tutorial


Please forgive me, the design of my blog is not finished completely, but I decided to start with the first post.

Last summer I made few denim lollipop flowers and they got good ratings on my docraft gallery, so I would like my first post to be short tutorial on them. I must also add that they are inspired by Prima flowers.

This is what you need:


  1. old jeans or any canvas type fabric. 
  2. various circle templates ( I use my spellbinder dies)
  3. some fabric stiffener ( I make my own, but I am sure you can buy some too) 
  4. pen
  5. sharp scissors
  6. glue gun
  7. some flower centres (beads, buttons,...)
  8. mists (optional) 
Using your chosen stencils and scissors, cut circles out of fabric in various sizes.

Then each circle soak well in fabric stiffener, crumple them up in balls and get out excess liquid,
 
Unfold them and gently stretch the edge of the circle, leave flat to dry ( I leave them overnight). Once dried you have something like this:

At this stage they can be misted gently or dyed with distress ink, then left for few minutes to dry again. Sew or glue flower centre on the top layer and glue gun the rest of the layers as desired, I like altering two colours.

And for the end there are some pages I made with these:


Oh, I just realized  I forgot to take a photo of my the most recent and best page, I will post it tomorrow.
Thank you for reading my blog, comments and suggestions are very welcome.

Svjetlana x